Looking to secure 1/2-inch plywood sheathing but confused about the right nail size to use?
Want to know what size nails for 1/2 plywood sheathing to ensure a durable, safe, and efficient installation and avoid compromising the structural integrity of your project?
This blog will guide you through the process of selecting the perfect nail size for 1/2″ plywood sheathing. We’ll also provide you with expert tips and insights to make your construction project a success.

What Size Nails for 1/2 Plywood Sheathing?
For 1/2-inch plywood sheathing, 8d (eight-penny) nails are commonly used. These nails are typically 2 1/2 inches long with a diameter of around 0.131 inches. They provide sufficient length to secure the plywood to the framing without excessive penetration.
Comparison Chart
| Nail Size | Length (inches) | Diameter (inches) | Suitability for 1/2 Plywood Sheathing |
|---|---|---|---|
| 6d | 2 | 0.113 | Less ideal; may not provide sufficient holding strength |
| 8d | 2 1/2 | 0.131 | Most recommended; balances strength and size |
| 10d | 3 | 0.148 | Suitable but may be overkill for most applications |
| 12d | 3 1/4 | 0.148 | Typically too long; risk of over-penetration |
| 16d | 3 1/2 | 0.162 | Not recommended; excessive length for 1/2-inch plywood |
Different Types of Nails Suitable for 1/2 Plywood Sheathing
Ring Shank Nails
Ring shank nails are a popular choice for plywood sheathing. Their unique design features a series of rings, or threads, along the shank of the nail.
This gives them a strong grip that can resist pulling out, making them ideal for plywood sheathing.
For example, if you’re building a treehouse, ring shank nails would be a great choice because they can withstand the outdoor elements and the constant movement of the tree.
Common Nails
Common nails are your everyday, all-purpose nails. They have a smooth shank and a flat head, making them versatile for many projects.
When it comes to plywood sheathing, common nails can do the job. However, they might not hold as well as ring-shank nails in certain situations.
For instance, if you’re working on an indoor project like a bookshelf or a cabinet, common nails would be suitable.
Box Nails
Box nails are similar to common nails but are thinner. This makes them less likely to split the wood, which is especially important when working with plywood.
However, their holding power is not as strong as other types of nails.
So, if you’re working on a project that doesn’t require a high load-bearing capacity, like decorative wall paneling, box nails could be an excellent choice.
Roofing Nails
Roofing nails are primarily used for attaching shingles, but they can also be used for plywood sheathing. They have a large, flat head that provides good holding power and a short shank which makes them easy to drive in.
However, their short length may not provide enough penetration for some plywood sheathing applications.
So while they can be used in a pinch, they might not be the best choice for most plywood sheathing projects.
Why Nail Size Matters for 1/2 Plywood Sheathing?

Structural Integrity
The size of the nail you choose can greatly impact the structural integrity of your plywood sheathing. For instance, if you’re building a birdhouse, using the right size nails ensures the pieces of plywood hold together properly.
This means the birdhouse will be strong and durable, able to withstand wind and weather.
Ease of Installation
The nail size also affects how easy it is to install the plywood sheathing. Imagine you’re helping your dad build a shed.
If you use nails that are too big, it might be hard to hammer them in. But if they’re too small, they might not hold the plywood securely.
Using the correct nail size makes the installation process smoother and more efficient.
Aesthetic Considerations
Lastly, the size of the nails can affect how your project looks. Let’s say you’re making a plywood sign for your lemonade stand.
Smaller nails are less noticeable, giving your sign a cleaner, more professional look.
So, choosing the right nail size isn’t just about strength and ease of installation – it’s also about making your project look its best!
Safety
Using the correct nail size can also contribute to the overall safety of your project. Nails that are too long could protrude from the other side of the plywood, creating a potential hazard.
On the other hand, nails that are too short might not secure the plywood properly, causing it to loosen over time and possibly lead to accidents.
Efficiency
The right nail size can also improve the efficiency of your project. If you’re using nails that are too big for your plywood sheathing, you might end up spending more time trying to drive them in.
Conversely, if your nails are too small, you might need to use more of them to secure the plywood, which could also take up more time.
Cost
The size of the nails can also affect the cost of your project. Larger nails are generally more expensive than smaller ones.
So, if you’re working on a budget, choosing the right nail size can help you save money while still ensuring the success of your project.
Factors Influencing Nail Size Selection for 1/2 Plywood Sheathing
Type of Project (Indoor vs. Outdoor)
The type of project you’re working on can influence the nail size you choose.
For example, if you’re building an outdoor treehouse, you might need larger, more durable nails to withstand the elements.
Load Considerations
The weight your plywood sheathing needs to support also plays a role. If you’re building a bookshelf that will hold heavy books, you might need larger nails to ensure stability.
Material of the Plywood
The hardness of the plywood can affect the nail size. Harder woods may require larger nails to ensure proper penetration.
For instance, if you’re working with hardwood plywood for a cabinet, you might need larger nails compared to softer plywood.
Local Building Codes and Regulations
Always check your local building codes as they may specify certain nail sizes or types.
For example, if you’re building a deck, your local code might require specific nail sizes for safety reasons.
Corrosion Resistance
If your project will be exposed to moisture or chemicals, consider using corrosion-resistant nails.
For instance, if you’re building a dog house that will be outside in the rain, corrosion-resistant nails would be a good choice.
Budget Constraints
While it’s important to choose the right nail, also consider cost-effectiveness. Larger nails are generally more expensive, so if you’re working on a budget, you might need to balance cost with functionality.
How to Properly Install Nails in 1/2 Plywood Sheathing

Gather Your Materials
First thing first: let’s gather what you’ll need. You’ll need 1/2-inch plywood sheets, nails, a hammer, and measuring tape.
Keep these materials within arm’s reach. This way, you won’t have to keep going back and forth while you work.
Imagine you’re building a treehouse. You’ve cut your 1/2-inch plywood sheets to fit the walls.
Make sure you have everything you need nearby, like in a toolbox, before you start hammering the nails into the plywood.
Choose the Right Nails
Choosing the right nails is crucial. You’ll want nails that are at least twice as long as the thickness of your plywood. For 1/2-inch plywood, 1.5-inch nails would work great. This ensures a strong hold.
Let’s say you’re using 1/2-inch plywood for the treehouse. Pick 1.5-inch nails to make sure the plywood stays secure.
Mark the Nailing Spots
Grab your measuring tape and a pencil. Start marking the spots where you’ll hammer the nails.
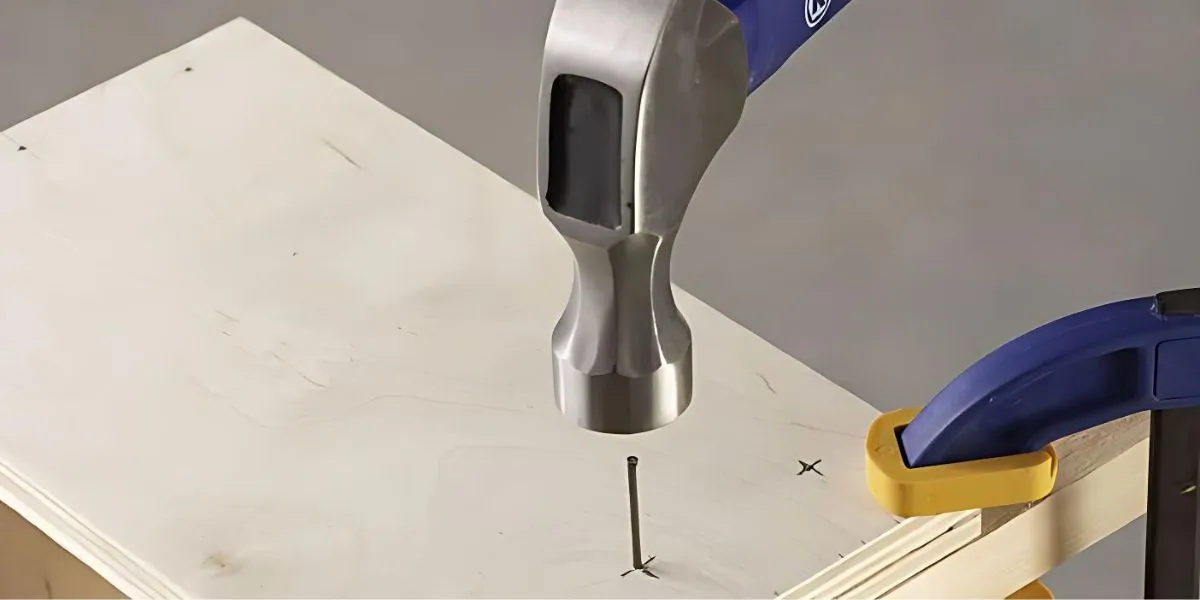
Space them about 6 inches apart along the edges and 12 inches apart in the field (middle area) of the plywood. Draw a small “X” where each nail will go.
Picture your plywood sheet like a big chocolate bar. Mark the edges like the outline and the field like the squares inside. The marks are where you’ll place the chocolate chips, or in this case, the nails!
Pre-drill Holes
Before you get all excited and start hammering, let’s pre-drill some holes.
This makes it easier for the nails to go in and reduces the chances of splitting the wood. Use a drill bit slightly smaller than the nail size.
Think of pre-drilling as digging small holes in the sandbox. It’s much easier to build a sandcastle if you prepare the holes first!
Hammer the Nails
Now comes the fun part: hammering! Hold the nail on the “X” mark you made. Keep the hammer’s face flat, and aim straight down.
Hit the nail until it sinks into the wood. Make sure it’s flush with the plywood surface.
Pretend you’re playing a game of Whack-a-Mole. Aim the hammer carefully and hit the nail just like you’d hit the mole popping out of the hole.
Check Your Work
Finally, you want to make sure everything’s secure. Gently shake or push the plywood. If it wobbles or makes noise, you might need to add more nails or hammer them in deeper.
Once you’ve built your sandcastle, you tap it lightly to make sure it’s sturdy. The same idea applies here; test the plywood to ensure it’s secure.
Safety Measures
Never forget safety! Always wear safety goggles to protect your eyes. Make sure to keep your fingers away from the path of the hammer. And always hammer away from your body, not towards it.
Think of safety gear like your bike helmet and knee pads. They protect you while you’re having fun, just like goggles protect your eyes when hammering nails.
Nails vs. Screws: What’s Better for 1/2 Plywood Sheathing?
Holding Power
Nails have great shear strength, making them a good choice for holding plywood sheathing against forces that try to slide the sheets apart.
Imagine you’re building a treehouse: nails would be great for holding the floor because they resist sliding forces.
On the other hand, screws have excellent pull-out strength, better at resisting forces that try to pull the plywood off.
If you’re hanging a heavy picture, screws would be better because they resist the downward force.
Installation Speed
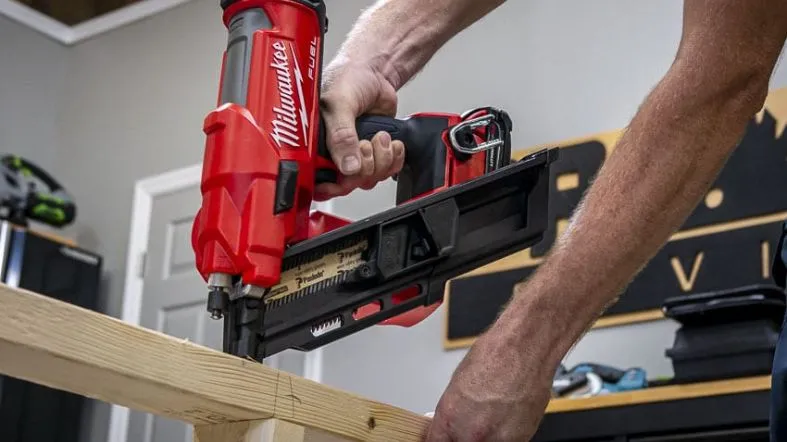
When it comes to speed, nails are usually faster because of nail guns. Think about a race to finish your treehouse before dark – nails could help you win!
However, screws take more time as they require pre-drilling and then a screwdriver or drill. But if you’re hanging a heavy picture, taking extra time for screws could be worth it.
Reusability
If you make a mistake or want to move your treehouse, screws are generally easier to remove and reuse than nails. So, if you like to change things up, screws might be your best bet.
FAQs
Can I use roofing nails for 1/2 plywood sheathing?
Is 6D nail size sufficient for 1/2 plywood sheathing?
Are ring shank nails good for 1/2 plywood sheathing?
Does the type of plywood affect the choice of nails?
Are 16d nails suitable for 1/2 plywood sheathing?
Conclusion
Choosing the right nail size and type is crucial for your plywood sheathing project. Always consider factors like project type, load considerations, and local building codes.
Whether you choose nails or screws, proper installation is key to your project’s success. Whether you choose nails or screws, proper installation is key to ensuring your project’s success.
