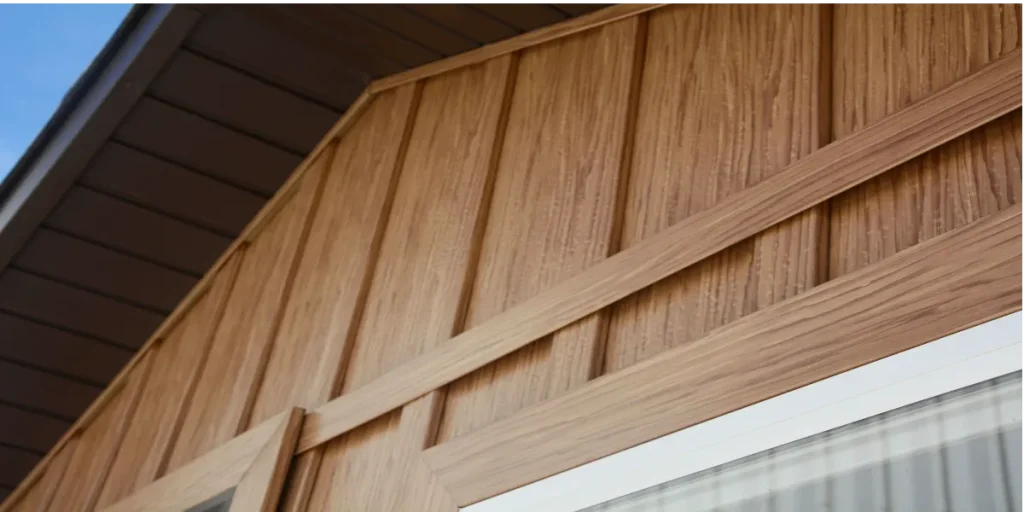
Board and batten is a classic style of exterior siding that is seeing a resurgence in popularity.
It involves using wide boards spaced apart with narrower boards, the battens, covering the spaces. Knowing what size nails for board and batten is crucial for a successful board and batten project.
In this blog, we’ll guide you on how to select the perfect nail size for your board and batten project, ensuring a sturdy and visually appealing result. Let’s nail this project together!

What Size Nails for Board and Batten?
For board and batten projects, it’s recommended to use 2-inch or 2.5-inch nails. These sizes ensure a secure attachment of boards and battens to the wall, providing stability and a neat finish. However, the exact size can vary depending on the thickness of your boards and battens.
Different Types of Nails and Their Sizes
| Nail Type | Material | Size |
|---|---|---|
| Brad Nails | Steel | 1-1/2 inches |
| Finish Nails | Steel or Stainless Steel | 2-1/2 inches |
| Siding Nails | Galvanized Steel or Aluminum | 2 to 3 inches |
Different Nail Types for Board and Batten
Brad Nails
Brad nails are small, thin nails that are perfect for attaching lightweight trim like battens. They’re usually made of steel and are about 1-1/2 inches long.
Finish Nails
Finish nails are slightly larger and provide more holding power. They’re ideal for attaching the boards in a board and batten setup. These nails are typically 2-1/2 inches long and can be made of steel or stainless steel.
Siding Nails
Siding nails are the largest and provide the most holding power. They’re used for attaching heavy or thick boards.
These nails are usually between 2 to 3 inches long and can be made of galvanized steel or aluminum.
How to Choose the Right Nail Size for Board and Batten
Understand the Thickness of Your Boards
To start, measure the thickness of the boards you’ll be using for your board and batten project. This is the foundation for choosing the right nail size.
For instance, if your boards are 1 inch thick, you’ll need nails that are at least 2 inches long.
Examine the Wall Material
Next, find out what your wall is made of. It could be drywall, plywood, or concrete. Different wall materials need different types of nails.
Nail Length: The Rule of Thumb
The rule here is simple. Take the thickness of your board and double it. If your boards are 1 inch thick, then a 2-inch nail is what you need.
Types of Nails to Consider
There are different kinds of nails, like finish nails and ring shank nails. Finish nails are smooth and easy to hide, which makes them great for indoor projects.
Ring shank nails have rings on them that grip the wood super tightly.
Consider the Nail Head
Nail heads come in different shapes and sizes. Flat heads are common and offer a good grip. Countersunk heads sink into the wood and can be hidden with putty.
Indoor vs Outdoor
If your project is outdoors, you’ll need nails that can resist rust, like galvanized nails. Indoor projects can use regular steel nails.
Quantity Estimation
To figure out how many nails you need, first calculate the square footage of your project.
Then plan for about 5 nails per square foot. If your project is 100 square feet, you’ll need around 500 nails.
Safety Gear and Tools
Before you start, gather your safety gear. You’ll need goggles to protect your eyes and gloves to protect your hands. If you’re using a nail gun, make sure you know how to use it safely.
Test Run with Scrap Wood
Always test a few nails on some scrap wood first. Make sure they go in smoothly and hold tightly. If the nail bends or the wood splits, try a different size or type of nail.
Check Your Work
After you’ve nailed in a few boards, give them a tug. They should feel solid and not move. If they do, you might need longer or thicker nails.
Factors Influencing Nail Size Selection for Board and Batten

Board and Batten Dimensions
Choosing the right nail size for board and batten is not a one-size-fits-all situation. The thickness of your boards and battens plays a significant role in determining the nail size.
If your boards are thick, you’ll need longer nails to ensure they penetrate through the board and into the wall securely. For instance, if your board is 1 inch thick, a nail that’s at least 2 inches long would be suitable.
The width of your battens can also influence the thickness of the nails you choose. Wider battens may require thicker nails to ensure they are held securely in place.
Wall Material
The type of wall material you’re working with also influences the nail size. If you’re attaching the board and batten to a wooden wall, you might need shorter nails.
But if the wall material is concrete or brick, longer nails would be required to secure the boards properly. Different materials have different hardness levels and may require different nail lengths.
For example, if you’re attaching your board and batten to a wooden wall, the wood is relatively soft, so you might be able to use shorter nails.
However, if you’re working with a harder material like concrete or brick, you’ll need longer nails to ensure they can penetrate deep enough to hold the boards securely.
Project Location
The location of your project, whether it’s indoors or outdoors, can also affect your choice of nail size.
Outdoor projects are exposed to various weather conditions, so you might need to use galvanized or stainless steel nails that are resistant to rust and corrosion.
Step-by-Step Guide: Installing Board and Batten with the Right Nails
Gather Your Materials
Start by gathering all the materials you’ll need. This includes your boards and battens, the right size nails, a hammer or nail gun, and safety gear like gloves and goggles.
Measure and Cut Your Boards and Battens
Measure the height and width of the area where you’ll be installing the board and batten. Then, cut your boards and battens to fit these measurements.
Choose the Right Size Nails
Refer to the guidelines discussed earlier to choose the right size nails for your project.
Remember to consider factors like the thickness of your boards and battens, the material of your wall, and the location of your project.
Install the Boards
Start by installing the boards. Use either finish or siding nails for this step, depending on the thickness of your boards. Make sure to drive the nails into the wall studs for a secure hold.
Install the Battens
Next, install the battens over the seams between the boards. Use brad nails for this step as they are smaller and less likely to split the wood.
Check Your Work
Once all the boards and battens are installed, take a step back and check your work. Make sure all pieces are secure and there are no loose nails.
FAQs
Can I use brad nails for both boards and battens?
No, brad nails are recommended for attaching lightweight trim like battens but not for securing the boards.
Is it necessary to use galvanized nails for an outdoor project?
Yes, for outdoor projects it’s advised to use galvanized or stainless steel nails to resist rust and corrosion.
Are finish nails suitable for installing the boards?
Yes, finish nails are suitable for installing the boards as they provide good holding power and are typically 2-1/2 inches long.
Do I need to double the thickness of my boards to determine nail length?
Yes, the rule of thumb is to take the thickness of your board and double it to determine the appropriate nail length.
Does the wall material affect the nail size?
Yes, harder wall materials like concrete may require longer nails, while softer materials like wood may require shorter nails.
Conclusion
Understanding the Resurgence of Board and Batten Siding is more than a nod to a classic architectural style; it’s about executing it perfectly.
By choosing the right nails, understanding your board’s thickness, and considering the wall material, you set yourself up for a project that’s both beautiful and structurally sound.
Let’s nail your next board and batten project together!

