Choosing the right nail size for fiber cement siding is crucial for a strong and secure connection.
Getting it right can save you time, effort, and money, while the wrong choice can lead to costly repairs down the line. So, what size nails for fiber cement?
This comprehensive guide aims to answer just that, delving into the various types of nails suitable for fiber cement siding, how to determine the perfect nail size, and more. Let’s read on!

What Size Nails Should You Use for Fiber Cement Siding?
For installing fiber cement siding, 1.25-inch to 2.5-inch galvanized nails are commonly used. The ideal size may vary based on the thickness of the siding and underlying material. Ring shank or spiral shank nails are often recommended for better holding power.
Comparing Nail Sizes for Fiber Cement Siding
| Nail Type | Length Range (inches) | Best for |
|---|---|---|
| Ring Shank Nails | 1.5 – 2.5 | All types of fiber cement siding |
| Galvanized Nails | 1.25 – 2 | Standard thickness siding (1/4″ to 5/16″) |
| Stainless Steel Nails | 1.5 – 2.5 | Coastal areas or humid climates |
| Roofing Nails | 1.25 – 1.5 | Thinner siding panels |
| Siding Nails | 1.25 – 2 | General use, any type of fiber cement siding |
| Masonry Nails | 1.5 – 2.5 | Fiber cement siding over masonry or brick |
Different Types of Nails Suitable for Fiber Cement Siding
Sure, let’s dive into the different types of nails suitable for fiber cement siding:
Ring Shank Nails
Ring shank nails are like the superheroes of the nail world. Their superpower? A special design that looks like threads or rings around the shaft.
This gives them a better grip, making them less likely to pull out. They’re perfect for areas with high winds or where the siding will face a lot of stress.
Galvanized Nails
Imagine a nail wearing a suit of armor. That’s what a galvanized nail is! These nails are coated with zinc to resist rust, making them a great choice for areas with high humidity or lots of rain.
Plus, they’re pretty tough, so they can stand up to a lot of wear and tear.
Stainless Steel Nails
Stainless steel nails are like the knights of the nail world. They’re incredibly strong and resist rust, which makes them perfect for any weather conditions.
They might be a bit more expensive, but they’re worth it for their durability.
Roofing Nails
Roofing nails might be designed for roofs, but they’re also great for siding! They have a large head, which helps to hold the siding in place securely.
Just make sure to choose the right length for your siding thickness.
Siding Nails
Siding nails are the go-to choice for most siding projects. They’re specifically designed for this job, with a thin shank and a wide head. This helps to secure the siding without causing damage.
Masonry Nails
If you’re attaching siding to masonry or concrete, masonry nails are your best friend. They’re super strong and can penetrate hard materials without bending or breaking.
How to Determine the Right Nail Size for Your Fiber Cement Siding

Measuring the Thickness of Your Fiber Cement Siding
Start by using a ruler or tape measure to find out how thick your fiber cement siding is. Knowing the thickness will help you pick the right nail size.
For example, if your siding is 5/16-inch thick, you’ll need a different nail size than for 1/2-inch thick siding. Write down the measurements so you don’t forget!
Types of Nails Suitable for Fiber Cement Siding
There are three types of nails you can use: roofing nails, siding nails, and galvanized nails. Roofing nails have a large, flat head and are great for holding siding in place.
Siding nails are thinner and sometimes have a colored head to match the siding. Galvanized nails resist rust, which is super useful for outdoor projects.
If you’re using gray siding, maybe choose galvanized nails with a gray coating so everything matches.
The 1.5-Inch Rule for Nail Length
A general rule is that the nail should be at least 1.5 times longer than the thickness of the siding. This makes sure the nail goes in deep enough to hold the siding but not so deep that it damages anything.
If your siding is 1/2-inch thick, then a nail that’s at least 3/4-inch long would work. Just multiply the thickness by 1.5 to find out the right length!
Checking Building Codes for Restrictions
Don’t forget to check local building codes! Sometimes there are rules about what size and type of nails you can use.
You wouldn’t want to buy the wrong nails and then have to start over. Imagine building a treehouse but using nails that are too short; it might not be safe or sturdy!
The Importance of Nail Spacing
Nail spacing is how far apart each nail is from the next. Proper spacing keeps the siding secure and looking nice. For fiber cement siding, nails should generally be spaced 16 to 24 inches apart.
You can use a chalk line to mark where the nails will go, making sure they are straight and evenly spaced. It’s like dotting your paper before you draw a line, to make sure it’s straight!
Test Before the Final Installation
Before you install all the siding, do a little test run. Take a small piece of siding and the nails you think are right. Attach the siding to a scrap piece of the same material you’re using for the actual building.
This is your practice round! Make sure the nails go in easily and hold the siding tightly. If everything looks good, you’re ready for the big game!
Safety Precautions While Nailing
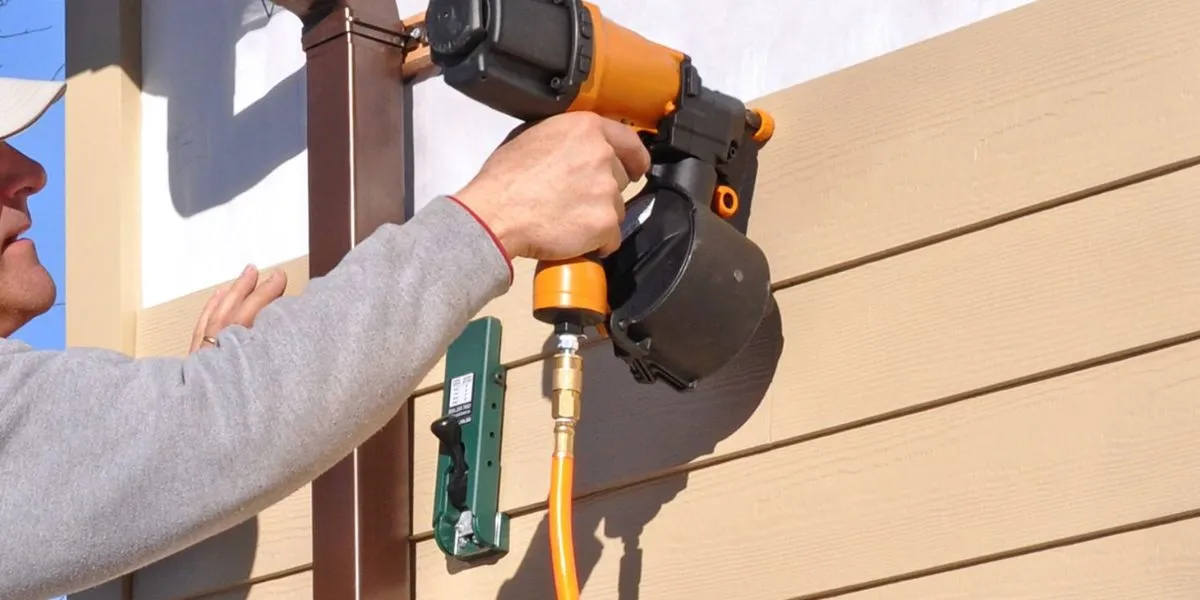
Last but not least, safety first! Always wear safety goggles to protect your eyes and gloves to protect your hands. Make sure your ladder is sturdy if you’re working up high.
Ask a grown-up for help if you’re not sure how to use the tools. Remember, being safe is as important as picking the right nail size.
Factors Influencing Nail Size Selection for Fiber Cement Siding

Material Compatibility
Just like how puzzle pieces fit together, the nail material should be compatible with the siding material.
For example, stainless steel nails work well with fiber cement siding because they resist rust and corrosion.
Weather Conditions
Think of this like dressing for the weather. You wouldn’t wear a raincoat in sunny weather, right? Similarly, consider your local weather conditions when choosing nail size and type.
In areas with high humidity or rainfall, rust-resistant nails like galvanized or stainless steel are a good choice.
Durability Requirements
This is like choosing a sturdy backpack for a long hike. You want something that will last! Choose a nail that will last as long as your siding. Stainless steel nails, for example, are known for their durability.
Cost Considerations
This is all about getting the most bang for your buck. While stainless steel nails may be more expensive upfront, they can save money in the long run by preventing rust damage and the need for replacements.
Ease of Installation
Some nail types are easier to install than others. It’s like choosing between using a map or a GPS for directions – some tools just make the job easier!
For example, ring shank nails have a special design that provides better grip and makes them easier to install.
Regulatory Compliance
Last but not least, always ensure your project complies with local building codes and regulations. It’s like following the rules of a game – it ensures everything runs smoothly and safely!
Common Mistakes to Avoid When Nailing Fiber Cement Siding
Using the Wrong Nail Size
Imagine trying to fit a square peg in a round hole. It just doesn’t work, right?
The same goes for using a nail that’s too short or too long for your siding installation. It can cause problems like loose siding or damage to the siding itself.
Using the Wrong Nail Type
Not all nails are created equal! It’s like picking the right tool for a job. Make sure you’re using the right type of nail for your project. For example, using a roofing nail for siding might not give you the best results.
Incorrect Spacing
Think of this like a dance. Each nail needs its own space to do its job properly. Nails should be spaced evenly and not too close to the edges of the siding panels.
If they’re too close together or too far apart, it can lead to problems like warping or buckling.
Overdriving the Nails
Driving nails too deep is like over-tightening a screw. It can damage the siding and reduce its effectiveness. Remember, the nail should secure the siding, not crush it!
Underdriving the Nails
On the other hand, nails that aren’t driven deep enough can cause the siding to come loose over time. It’s like tying a loose knot – it won’t hold for long!
FAQs
Can I use roofing nails for fiber cement siding?
Are masonry nails suitable for wooden structures?
Do stainless steel nails require special tools for installation?
Does nail spacing impact the siding’s durability?
Are galvanized nails suitable for coastal areas?
Conclusion
Choosing the right nail size and type is crucial for a successful fiber cement siding installation.
Always measure your siding, consider local conditions, and follow building codes. Avoid common mistakes like using the wrong nail size or type, incorrect spacing, or driving nails too deep or not deep enough.
