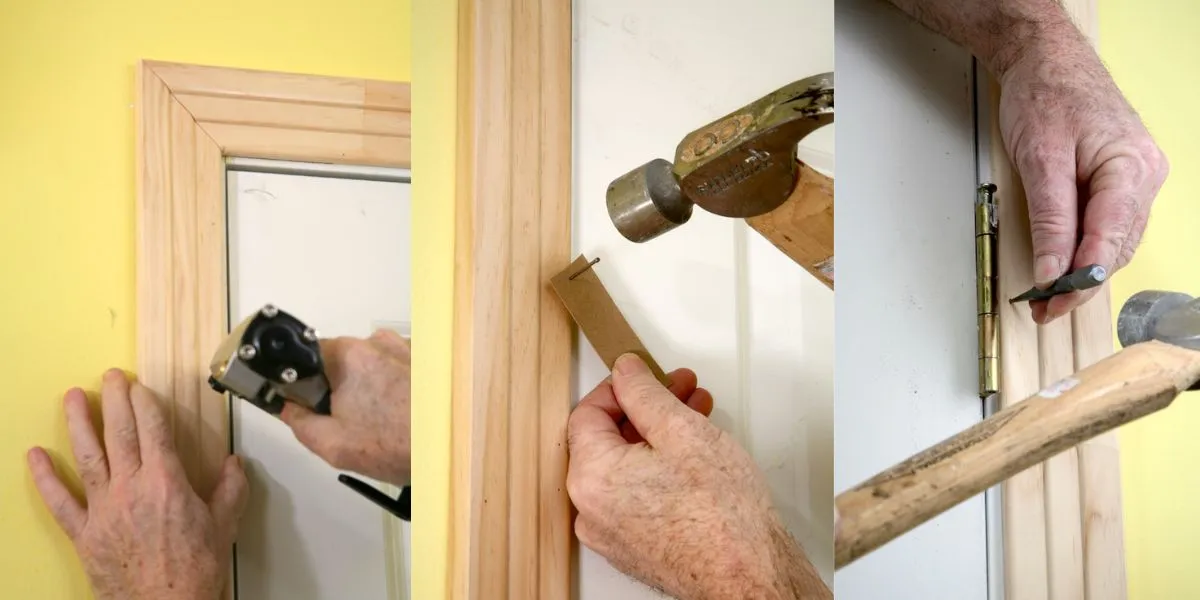
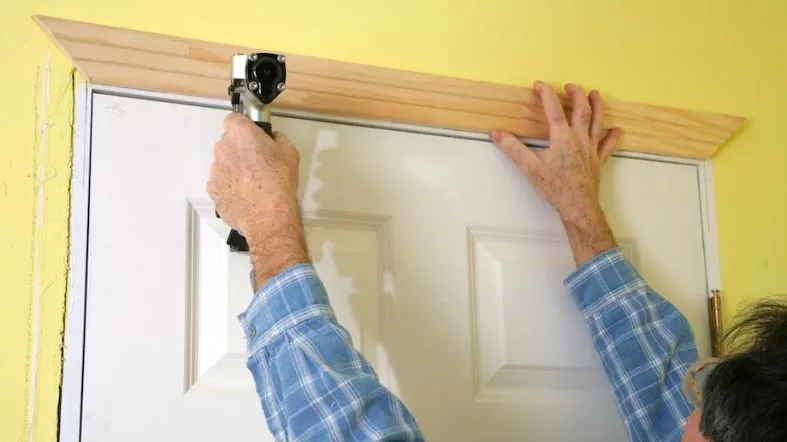
Knowing what size nails for interior door frame is crucial for a secure and professional finish. Get it right, and you’ll benefit from a sturdy and durable frame. Get it wrong, and you risk structural issues that can lead to costly repairs.
This blog will guide you through the crucial aspects of nail selection for interior door frames, including how to determine the appropriate nail size, exploring various types of nails, and essential tips for the installation process.
What Size Nails for the Interior Door Frame?
For installing an interior door frame, 8d (2.5-inch) or 10d (3-inch) finish nails are commonly used. These nails are long enough to securely fasten the door frame to the wall framing. If you’re working with thinner or thicker materials, you might need to adjust the nail size accordingly.
Interior Door FramesNail Sizes Chart:Nail Size Length Recommended Use 6d 2-inch Light trim and moldings 8d 2.5-inch Standard door jambs and framing 10d 3-inch Heavier framing or thicker materials 12d 3.25-inch Special cases; usually overkill
Types of Nails for Interior Door Frames
Finishing Nails
Finishing nails, also known as brads, are a great choice for interior door frames. They have a small head that can be easily hidden in the wood, giving your door frame a clean and polished look.
These nails are typically 1-2 inches long, making them ideal for lighter frames.
Casing Nails
Casing nails are a step up from finishing nails. They have a slightly larger head and are a bit thicker.
This makes them stronger and more visible, but they can still be countersunk and covered with wood filler for a smooth finish. Casing nails are usually 2-3 inches long, perfect for medium-weight frames.
Common Nails
Common nails are the heavy-duty option. They’re larger and stronger than both finishing and casing nails, with a large, flat head that provides plenty of holding power.
These nails are typically 2-4 inches long. If you have a heavy or solid wood door frame, common nails might be your best bet.
Box Nails
Box nails are the light-duty option. They’re thinner than common nails, which makes them less likely to split thin or delicate woods.
However, they’re not as strong or sturdy as the other types of nails we’ve discussed. Box nails are usually 1-2 inches long and work well for light frames or trim.
How to Determine the Right Nail Size for Interior Door Frame

Measuring the Thickness of the Door Frame
First things first, grab your trusty tape measure. Extend the tape across the width of your door frame, not the door itself.
Make a mental note of the measurement or jot it down. For example, if the frame is 1.5 inches thick, you’ll need that information to choose the right nail size.
Know the Types of Nails Available
You can find different types of nails at the store. The common types are finishing nails, wire nails, and masonry nails.
For an interior door frame, finishing nails work best. They have small heads and sink into the wood smoothly. You wouldn’t want big, ugly nail heads sticking out, right?
Calculating the Proper Nail Length
Here’s a cool rule to remember: the nail should be three times longer than the thickness of the wood it’s going into.
So, if your door frame is 1.5 inches thick, you need a nail about 4.5 inches long. Grab your calculator, multiply 1.5 by 3, and voila! You get 4.5.
The Importance of Shank Diameter
The shank is the long, skinny part of the nail. Its thickness is called “diameter”. You want a diameter that’s sturdy but not too thick. If the shank diameter is too big, you risk splitting the wood.
If it’s too small, the nail won’t hold well. A good rule is to pick a nail with a diameter that is 1/8th of the thickness of the door frame. For a 1.5-inch frame, a nail with a diameter of about 0.1875 inches should work great.
Check for Corrosion-Resistance
No one likes rusty nails, especially not in your brand-new door frame. Make sure the nails are rust-resistant.
Stainless steel or galvanized nails are top choices for avoiding rust.
Dry Test with One Nail
Before you commit, test one nail first. Hammer it into a scrap piece of wood that’s similar to your door frame. See how it holds.
Does it sink in just right without splitting the wood? If yes, you’ve found your perfect match!
Nail Spacing for Security
You’ve got the right nails, but where should you put them? Space them evenly for the best hold.
A good rule is to start at the top corner and place a nail every 12 inches down the sides. If your frame is 72 inches high, you’ll use about 6 nails on each side.
Double-Check with a Level
After you’ve put in a couple of nails, check your work with a level. It’s a tool that tells you if something is perfectly straight.
If the bubble in the liquid is between the two lines, you’re golden. If not, you might have to adjust the frame a bit.
The Art of Hammering
Finally, it’s hammer time! Hold the nail at a slight angle when you hammer it in. This gives it extra grip in the wood. Tap gently at first, then give it a good whack to drive it home.
Always wear safety goggles to protect your eyes from any flying wood chips or nails.
Factors Affecting Nail Size Selection for Interior Door Frame

Material Compatibility
The type of nail you choose should be compatible with your door frame material. For example, if you’re using a wooden frame, a steel nail would be a good choice.
But if your frame is made of metal, you might need a different type of nail to prevent corrosion.
Weight of Door
The weight of your door plays a big role in nail selection. Heavier doors require stronger, longer nails to hold them securely.
For instance, a solid wood door might need a 3-4 inch common nail, while a lighter, hollow-core door could be hung with a 2-inch finishing nail.
Wall Thickness and Type
The thickness and type of your wall also affect the nail size. Thicker walls may require longer nails to reach and secure the frame properly.
Also, consider the wall material. If it’s drywall, wood, or masonry, each might require a different type or size of nail.
Nail Penetration Depth
The nail should penetrate deep enough into the frame to hold it securely but not so deep that it splits the wood. As a rule of thumb, at least two-thirds of the nail should be embedded in the frame.
Building Codes and Regulations
Always check your local building codes before starting your project. They may have specific requirements for nail size and spacing that you need to follow.
Not only will this ensure your door is safe and secure, but it will also keep your project up to code.
Common Mistakes to Avoid
Using the Wrong Nail Size
One of the most common mistakes is using the wrong nail size. If the nail is too short, it won’t hold the frame securely.
If it’s too long, it can split the wood. Always measure your door frame and choose a nail that’s about three times longer than the thickness of the frame.
Incorrect Spacing
Another mistake is the incorrect spacing of nails. Nails should be evenly spaced along the frame to ensure a secure hold.
If they’re too close together, they can weaken the wood and cause it to split. If they’re too far apart, they might not hold the frame securely.
Overdriving and Underdriving Nails
Driving nails too deep into the wood can cause damage, while not driving them deep enough can lead to a weak hold.
The nail should be driven in just enough so that its head is flush with the surface of the wood.
Ignoring Local Building Codes
Always check your local building codes before starting your project. They may have specific requirements for nail size and spacing that you need to follow.
Ignoring these codes can lead to problems down the line, such as failing a home inspection.
How to Install Nails in an Interior Door Frame
Tools You’ll Need
Before you start, make sure you have the right tools. You’ll need a hammer, a measuring tape, and of course, your chosen nails. It’s also a good idea to have a pencil for marking where your nails will go.
Step-by-Step Installation Guide
- Measure and Mark: Use your measuring tape to measure where your nails will go on the door frame. Mark these spots with your pencil. Remember, the nails should be evenly spaced for a secure hold.
- Position the Nail: Hold the nail in place on your first mark.
- Start the Nail: Tap the nail gently with your hammer until it’s secure enough to hold its position. This is called “starting” the nail.
- Drive the Nail: Once the nail is started, you can drive it in with more force. Be careful not to hit your fingers!
- Repeat: Repeat this process for all your marked spots.
Safety Precautions
Safety is important when working with tools. Always wear safety glasses when hammering nails to protect your eyes from flying debris. And remember, always hammer in a controlled manner to avoid injury.
FAQs
Can I use 6d nails for an interior door frame?
Is it necessary to check local building codes before installing nails?
Are stainless steel nails a good choice for corrosion resistance?
Does the weight of the door affect the size of the nails?
Can I use box nails for my solid wood door frame?
Conclusion
Choosing the right nail size for your interior door frame is crucial for a secure and professional finish.
Remember to consider factors like door weight, frame thickness, and local building codes. Happy DIY-ing!
