Knowing what size nails for door jambs is crucial for a sturdy and neat installation. Using the wrong size can lead to issues like splitting wood, unstable doors, and unsightly finishes.
In this blog, we’ll guide you on selecting the perfect nail size for your door jamb and discuss the consequences of using the wrong size.
Stay tuned to avoid common mistakes and ensure a smooth, professional-looking installation.

What Size Nails for Door Jamb?
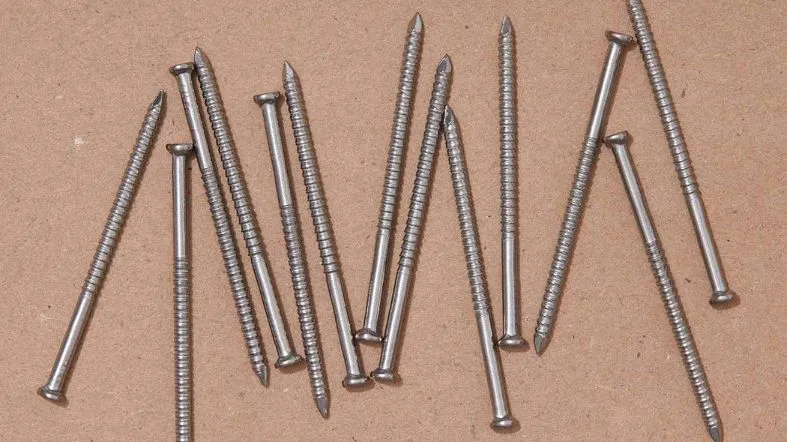
For installing a door jamb, 8D or 10D finish nails are commonly used. These nails are approximately 2.5 to 3 inches long and provide good holding power. However, the size of the nail will depend on several factors such as the thickness of the jamb and the building code.
Here’s a table chart that includes nail sizes and their specific uses for door jamb:
| Nail Size | Specific Use |
|---|---|
| 2 1/2 inches | Attaching the jamb to the framing |
| 16-15 gauge | Nailing the trim |
| 3 inches | Nails that pin the jamb to the door |
Why Nail Size Matters for Door Jambs?
Stability and Durability
The right nail size is crucial for the stability and durability of your door jamb. If the nails are too small, they might not hold the jamb securely, causing it to wobble or even fall out.
On the other hand, if the nails are too large, they could split the wood, weakening the jamb and shortening its lifespan.
Ease of Installation
Using the correct nail size also makes the installation process easier and more efficient. Nails that are the right size can be driven into the wood smoothly, without requiring excessive force or causing damage.
This not only makes your work easier but also results in a neater and more professional-looking installation.
Safety Concerns
Safety is another important reason why nail size matters for door jambs. A poorly installed door jamb due to incorrect nail size could pose safety risks.
For example, if the jamb is not secure, the door could fall out unexpectedly, potentially causing injury. Therefore, always choose the correct nail size to ensure a safe and secure installation.
Types of Nails Suitable for Door Jambs

Finish Nails
Finish nails are a popular choice for door jambs. They are known for their small heads, which can be easily hidden, making the finish look neat and tidy. These nails are perfect for standard doors and are easy to install.
Casing Nails
Casing nails are a step up from finish nails in terms of thickness and strength. If you have a heavier door, these nails are your go-to option. They provide the extra support needed without compromising on the aesthetics.
Brad Nails
Brad nails are the thinnest of the lot. They are ideal for attaching lightweight trim to the door jamb.
While they may not provide as much support as finish or casing nails, they do a great job when it comes to light-duty tasks.
Common Nails
Common nails are the thickest and strongest type of nail. They are designed for heavy-duty applications.
However, due to their large heads, they are not typically used for door jambs as they can disrupt the smooth finish.
How to Choose the Right Nail Size for Door Jamb
Know the Standard Nail Sizes for Door Jamb Installation
First up, it’s all about knowing your nail sizes. The common nail sizes used for door jamb installations are 6D, 8D, and 10D finish nails.
The ‘D’ stands for “penny,” an old way to measure nails. A 6D nail is 2 inches long, an 8D nail is 2.5 inches, and a 10D nail is 3 inches.
Picture this: A 6D nail is like a short pencil, an 8D is a bit longer like a crayon, and a 10D nail is as long as a new toothbrush.
Assess the Thickness of Your Door Jamb
Measure your door jamb’s thickness with a ruler or tape measure. Standard door jambs are usually 3/4-inch thick. If your door jamb is this standard thickness, an 8D nail works perfectly.
The nail has to go through the jelly and stay in the bread without poking out the other side.
Consider the Wall Material
Next, think about your wall material. Is it drywall or something tougher like concrete? For drywall, 6D or 8D nails are often enough.
But if you’re dealing with a harder wall like concrete, you may need 10D nails.
Factor in the Door Weight
Heavy doors need strong support. If your door feels as heavy as a big school backpack, you should use 10D nails for extra strength. Heavier doors need thicker nails.
Check for Special Features
Sometimes doors have special features like windows or intricate designs. If that’s the case, you may need different nail sizes in different areas.
For bigger, heavier pieces, go for 8D or 10D nails. Each nail is like a Lego piece that holds your castle (door) together.
Conduct a Nail Test
Before you get all excited and start nailing, do a test. Grab a scrap piece of wood that’s the same thickness as your door jamb.
Try nailing it to a similar wall material. This practice is like a rehearsal before the school play. You get to see how the nail works before the real show starts.
Safety First: Protective Gear
Never forget safety! Wear goggles to protect your eyes and gloves for your hands. You don’t want to get hurt while you’re being a handy helper.
Safety gear keeps you protected when you’re doing something important.
Factors Influencing Nail Size Selection for Door Jamb

Door Jamb Material
The material of your door jamb plays a significant role in the nail size selection. For instance, hardwood jambs require longer and stronger nails, while softwood jambs can work with shorter and thinner nails.
Door Weight
The weight of your door is another crucial factor. Heavier doors demand stronger nails for secure holding, whereas lighter doors can be handled with thinner nails.
Door Jamb Thickness
The thickness of your door jamb also influences the nail size. The chosen nail should be long enough to penetrate through the jamb and into the wall stud, ensuring a firm hold.
Type of Nail
The type of nail you choose depends on your specific needs. For a neat look, finish nails are suitable. For heavier doors, casing nails provide the necessary strength.
Test Before Use
Before you start nailing your door jamb, it’s wise to test the chosen nail size on a scrap piece of wood similar to your door jamb.
This step ensures that the size is right and prevents any mishaps during the actual installation.
Best Practices for Installing Nails in Door Jambs
Choose the Right Nail
Start by choosing the right nail for your door jamb. Consider factors like the material of the door jamb, the weight of the door, and the thickness of the jamb.
Pre-drill Holes
Pre-drilling holes can make the nailing process smoother and prevent splitting of the wood. Use a drill bit that is slightly smaller than your nail.
Nail Placement
Place your nails strategically. They should be evenly spaced and not too close to the edges to avoid splitting the wood.
Nail Installation
When installing the nail, hold it straight and drive it in slowly to ensure it goes in straight. Avoid hammering too hard as it can damage the wood.
Conceal the Nail Heads
Once you’ve installed the nails, use a nail set to drive the nail heads below the surface of the wood. This will give your door jamb a clean, finished look.
Fill Nail Holes
Finally, fill in any nail holes with wood filler for a smooth finish. Once it’s dry, you can paint or stain over it to match your door jamb.
FAQs
Can I use common nails for door jambs?
Common nails are not recommended for door jambs due to their large heads disrupting the finish.
Is pre-drilling necessary when nailing door jambs?
Pre-drilling is advised to prevent wood splitting and make the nailing process smoother.
Are brad nails suitable for heavy doors?
No, brad nails are ideal for light-duty tasks and are not recommended for heavy doors.
Do casing nails provide more strength than finish nails?
Yes, casing nails are thicker and stronger, making them suitable for heavier doors.
Are 6D nails adequate for attaching the door jamb to drywall?
Yes, 6D nails are generally adequate for attaching a standard door jamb to drywall.
Conclusion
Choosing the right nail size for your door jamb is crucial for a secure and stable installation.
Always consider factors like material, thickness, load-bearing requirements, local codes, cost, and available tools when selecting your nails. Happy building!

