Choosing the right nail size for crown molding can make or break your DIY project.
It’s not just about grabbing a hammer and some nails; it’s about knowing what size nails for crown molding and finding accordingly to ensure stability and aesthetic appeal.
Whether you’re working with wood or MDF, thick or thin moldings, our guide will help you navigate through the process.
We’ll delve into the importance of nail size, explore different types of nails, and provide tips for measuring and selecting the perfect fit. Let’s nail this project together!
What Size Nails for Crown Molding?
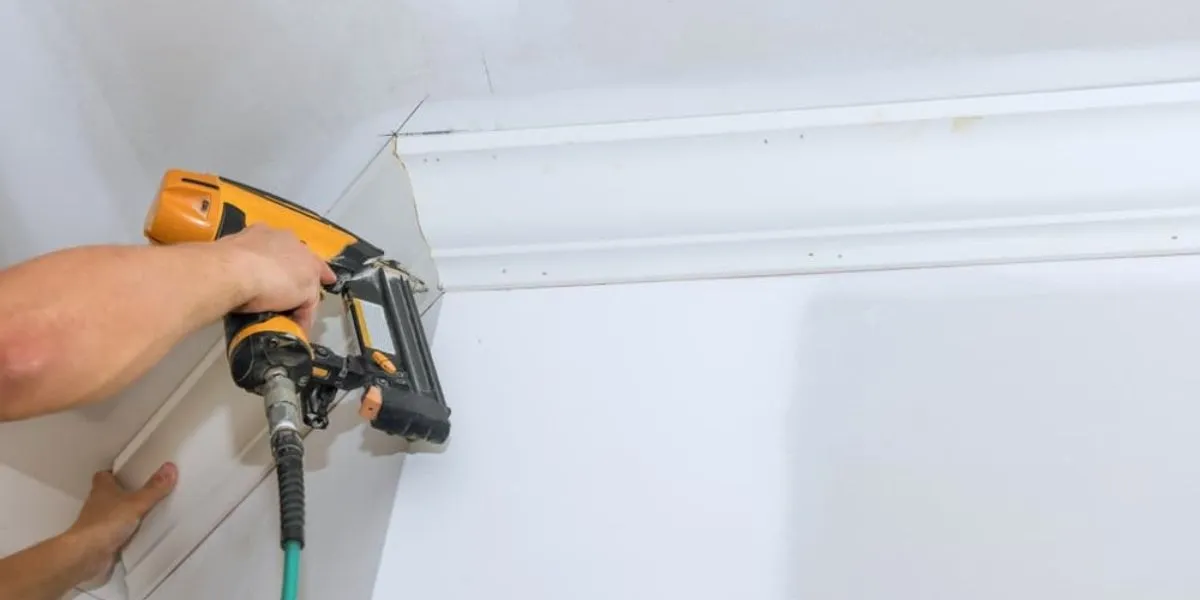
For installing crown molding, the recommended nail size is generally 16-gauge or 18-gauge finishing nails. These nails are long enough to secure the molding to both the wall and the ceiling. The length should be at least 2 inches for effective installation.
Material and Nail Size Table
| Crown Molding Thickness | Material | Recommended Nail Size |
|---|---|---|
| Up to 1/2 inch | Softwood | 18-gauge, 1.5-2 inches |
| 1/2 to 3/4 inch | Softwood | 16-gauge, 2 inches |
| 3/4 to 1 inch | Hardwood | 16-gauge, 2.5 inches |
| Over 1 inch | Hardwood | 15-gauge, 3 inches |
| Up to 1/2 inch | MDF | 18-gauge, 1.5-2 inches |
| Over 1/2 inch | MDF | 16-gauge, 2-2.5 inches |
Different Types of Nails Suitable for Crown Molding
Finish Nails
Finish nails are a popular choice for crown molding. They are thin, which makes them less likely to split the wood.
The small head of a finish nail is also a plus because it can be easily concealed, giving your crown molding a clean, seamless look.
For example, if you’re installing a wooden or MDF crown molding that’s about half an inch thick, a 4d (1-1/2 inch) finish nail would be a good fit.
Brad Nails
Brad nails are even thinner than finish nails, making them perfect for delicate moldings. They’re great for attaching small pieces of trim, such as quarter-round or shoe molding.
For instance, if you’re working with delicate plaster molding, brad nails can provide the gentle hold you need without causing damage.
Pin Nails
Pin nails are the thinnest of all, and they’re best used for small, intricate moldings. They’re so thin that they can often be used without leaving a noticeable hole.
This makes them ideal for detailed work where appearance is crucial. For example, if you’re installing a finely detailed piece of crown molding in a formal dining room, pin nails would be an excellent choice.
Common Nails
Common nails are thicker and have a large head. They’re typically used for heavy-duty construction and aren’t usually the best choice for crown molding because their large heads can be difficult to conceal.
However, in some cases where the molding is exceptionally thick or heavy, or if it’s being installed in an informal area like a workshop or garage, common nails might be used.
The Importance of Nail Size in Crown Molding Installation
Stability and Durability
Choosing the right nail size is crucial for the stability and durability of your crown molding. If the nails are too short, they might not hold the molding securely.
On the other hand, if they’re too long, they could go through the molding and damage it. For example, a 1/2 inch thick wooden molding might need a 4d (1-1/2 inch) nail for a secure fit.
Aesthetic Considerations
The size of the nail can also affect the look of your crown molding. If the nail head is too big, it could be visible and disrupt the smooth appearance of the molding.
For instance, using a finish nail with a small head can help maintain a clean look.
Safety Aspects
Safety is another important factor. Using nails that are too long could lead to accidents during installation, like hitting a wire or pipe in the wall.
Always make sure to choose the correct nail size and follow safety guidelines during installation.
Effect on Installation Process
The size of the nail can significantly impact the installation process. If the nails are too big, they might split the molding or the wall.
Conversely, if they’re too small, they might not provide enough grip, causing the molding to fall off.
Impact on Future Maintenance
The right nail size can also make future maintenance easier. If you ever need to remove or replace the molding, using the correct nail size will make this process smoother and less likely to cause damage.
Influence on Overall Project Success
Ultimately, the success of your crown molding project can hinge on something as seemingly minor as nail size.
By taking the time to choose the right nails, you’re setting yourself up for a successful installation that looks great and stands the test of time.
Factors Influencing Nail Size Selection for Crown Molding
Thickness of the Crown Molding
The thickness of the crown molding is a primary factor in determining nail size. If the molding is thick, you’ll need longer nails to ensure they penetrate deep enough to secure the molding to the wall.
For example, if you have a crown molding that’s 1 inch thick, you might need a nail that’s at least 2 inches long to secure it properly.
Material of the Crown Molding
Different materials have different densities and hardness levels. For instance, hardwood moldings like oak or maple are denser and require sturdier nails, while softer materials like MDF or pine can be installed with thinner nails.
The nail should be strong enough to penetrate the material without causing it to split or crack.
Wall Material
The type of wall you’re attaching the molding to also matters. If it’s a drywall, it might not hold larger nails as securely as a wooden or masonry wall would.
In such cases, using smaller nails might provide a better hold. Conversely, if you’re working with a solid wood or masonry wall, you might need larger, stronger nails.
Load Considerations
If your crown molding is expected to bear additional weight (like hanging picture frames or curtains), you’ll need larger and stronger nails to support that load.
The added weight increases the stress on the nails, so they need to be sturdy enough to handle it.
Indoor vs. Outdoor Installation
Outdoor installations face weather elements like rain and humidity that can cause rusting or corrosion in nails.
Therefore, for outdoor installations, you might need to use larger stainless steel or galvanized nails that can resist these conditions.
Building Codes and Regulations
Local building codes and regulations may specify certain types or sizes of nails for different construction projects. It’s important to check these regulations before starting your project to ensure compliance.
Budget Constraints
Larger nails are generally more expensive than smaller ones. If budget is a concern, this could influence your choice of nail size.
However, remember that skimping on nail size could lead to stability issues in the future.
How to Correctly Measure and Choose the Right Nail Size for Crown Molding
Understanding Crown Molding Dimensions
To pick the right nail size, you first need to understand crown molding dimensions. Grab a measuring tape. Measure the thickness and the width of your crown molding.
The thickness is how deep the molding is, from the wall to the edge. The width is how tall the molding is from top to bottom. For example, your crown molding might be 3 inches wide and 1 inch thick.
Types of Nails to Use
Nails aren’t all the same! For crown molding, use finishing nails. They are smooth and will easily sink into the wood. There are different lengths, usually between 1 to 3 inches.
Stick to the lengths between 2 to 2.5 inches for most crown molding projects. Think of using a longer nail like using a longer pencil—it’s better for harder tasks!
The “Two-Thirds Rule” for Nail Size
Here’s a smart trick: the “Two-Thirds Rule.” Your nail should go into the wall at least two-thirds of its length. So if you have a 2-inch nail, about 1 and 1/3 inches should be in the wall.
This makes sure your crown molding stays put! If your molding is 1 inch thick, this rule helps you pick a 2-inch nail. It’s like choosing a book that’s just right—not too short, and not too long.
The Importance of Pilot Holes
Before you start hammering away, make small pilot holes. These are tiny holes that guide your nails. Use a drill bit that’s smaller than your nail.
Drill the pilot holes through the molding and a little into the wall. Imagine you’re making a pathway for your nail to follow. This helps your nail go in straight and avoids splitting the wood.
Nailing Technique: Straight or Angled?
When putting in your nails, you have two choices: straight or angled. For thinner moldings, go straight. Line up your nail with the pilot hole and tap it in.
For thicker moldings, angle your nail at about 45 degrees. Imagine your nail is a slide at the playground—angling it helps the molding slide into place better.
Countersinking and Filling
After you’ve nailed in the crown molding, it’s time to countersink. This means pushing the nail just below the surface of the wood. Use a nail set tool for this. Tap it gently with a hammer until the nail is slightly in.
Then, fill the hole with wood filler. Think of this like putting frosting on a cake—it makes everything look smooth and pretty!
Safety Measures
Safety first! Always wear safety goggles to protect your eyes. Make sure the area where you are working is clean and free of clutter. Don’t rush; take your time to aim and hammer correctly.
If you have to stand on something, use a sturdy ladder. Imagine you’re like a careful chef—every move counts!
FAQs
Can I use common nails for crown molding?
No, common nails are not recommended for crown molding due to their large heads, which are difficult to conceal.
Are brad nails suitable for hardwood crown molding?
Brad nails are not the best choice for hardwood crown molding; 16-gauge or 15-gauge finishing nails are more appropriate.
Do outdoor crown molding installations require special nails?
Yes, for outdoor installations, it’s advisable to use stainless steel or galvanized nails to resist rusting and corrosion.
Does the thickness of the crown molding influence nail size?
Yes, the thickness of the crown molding is a key factor in determining the appropriate nail size.
Is the “Two-Thirds Rule” applicable for all types of crown molding?
The “Two-Thirds Rule” is a general guideline and works well for most crown molding installations.
Conclusion
Choosing the right nail size for crown molding can make a significant difference in the overall quality and longevity of your installation.
By considering factors like material, thickness, and wall type, you’re not just hammering nails; you’re crafting a durable, beautiful addition to your home.
Remember, the devil is in the details, and in this case, those details are measured in gauges and inches.