We all agree that 6×36 tiles are very popular nowadays. They are considerably big; they are strong and you need less of them.
So, you may expect durability for your money.
But, when you want your tile and grout work done flawlessly, the trowel of appropriate size is the most important bid.
So, you must know what size trowel for a 6×36 tile or any other size tile. Without further ado, let’s determine the correct trowel size for you.

What Size Trowel For 6×36 Tile?
For a 6×36 tile, a 1/4 inch x 3/8 inch square notch trowel is recommended. This size ensures adequate adhesive for the tile’s size and shape, resulting in a secure and even installation. Always check manufacturer guidelines for specific tile requirements.
6×36 Tile Trowel Size Chart:
| Trowel Size | Suitable Tile Dimensions |
|---|---|
| 1/4 inch x 1/4 inch | Small tiles up to 4×4 inches |
| 1/4 inch x 3/8 inch | Tiles 6×6 to 6×36 inches |
| 3/8 inch x 3/8 inch | Tiles 12×12 to 16×16 inches |
| 1/2 inch x 1/2 inch | Large tiles 16×16 inches and above |
| U-notch 1/4 x 1/4 inch | Thin wall tiles like subway tiles |
| V-notch 3/16 inch | Thin tiles up to 4×4 inches |
Available trowel size for 6×36 size tile
Yes, you have your alternatives. In case the towels measuring 1/2 inch by 1/2 inch is nowhere to be found, a trowel measuring 1/4 inch by 3/8 inch is your alternative.
Moreover, a 3/8 Inch U-Notched trowel is also appropriate.
Instead of the square notched trowels, a trowel with U-shaped notches is preferred by certain floor installers.
They believe this shape provides a uniform distribution of mortar on the tile’s underside.
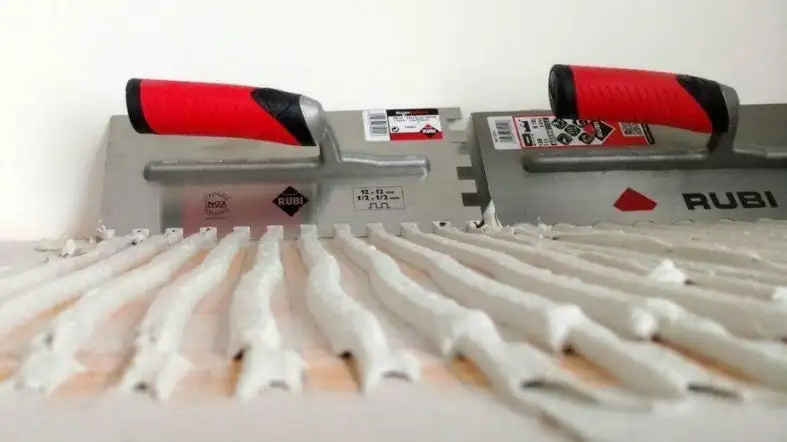
1/4 inch by 3/8-inch trowel: A 1/4″ x 3/8″ square-notched trowel produces 1/4″ wide by 3/8″ thick thin-set ridges on the substrate, and each ridge gets separated by 1/4″.
3/8 Inch U-Notched trowel: This type of trowel will leave a 1/8-inch layer of thin-set ridges on the substrate.
>> What trowel size for 3×12 tile?

| Trowel Size | Shape |
|---|---|
| 1/2 inch by 1/2 inch (1/2 X 1/2) | Square notched trowel |
| 1/4 inch by 3/8 inch (1/4 X 1/8) | Square notched trowel |
| 3/8 Inch | U-Notched trowel |
Trowel shapes in detail
There are many different forms, shapes, and sizes of thin-set mortar trowels.
There are no accepted criteria for selecting the appropriate trowel style. So, you are free to choose one based on your individual preferences.
>> What trowel should I use for 12×24 floor tile?
U-Notch and Square Trowels
U-notched tines are the most popular form of trowel used worldwide. Either a square notch or a U-shaped notch can be your option in this category.
Apart from the width and depth of these two types, there is only one significant difference between the two types.
Only somewhat greater coverage is offered by the U notches than the square notches.
Square trowels can also deal with huge-bodied tiles. Yet, you should think about using U-notches for something larger than 15-16 inches or slate or other abrasive stones.
>> What trowel size for 3×6 tiles?
V-Notch Trowels
Building walls work best with V-notch trowels, but you don’t have to use them as mandatory.
Compared to the standard square or U-notch variation, the V-notch is advantageous.
It applies somewhat less mortar or glue to your beloved wall. This prevents leaking from the seams between the tiles, which can be caused by the over-smearing of other trowels.
The only downside is that the V-notched type has a little less coverage than the U-notched type.
They are particularly prevalent with tiles that have a tiny body and range in size up to 6 inches.
>> What trowel type for 12×12 wall tile?
European Notch
There is also the option of using a trowel designed in European fashion. It includes notches of varying diameters all around its circumference.
This trowel covers huge tiles or stones better than the U-notch or square-notch. So, in a sense, this is the biggest tile shape available.
These European shape trowels are reliable to guarantee that tiles and stones of huge dimensions stay firmly in place on the wall.
Thus, they’re also good for ceilings that need lots of cement to keep tiles from slipping off.
>> Which trowel size for mosaic tile?
Mastering trowel selection
When deciding on the trowel size, the size of the trowel is the basic consideration. But not the only consideration.
You should also focus on the thin-set selection, thin-set consistency, and many more things at the same time to get the optimal result.
>> What kind of trowel for 4×4 ceramic tile?
The coverage is all that matters

End of the day, you just want full coverage with the trowels you are using. So, you have to choose the size considering various factors. But the coverage will matter the most.
A good example would be a 1/4″ x 1/4″ square notched trowel that’s perfect for installing any 6 X 24 subway tile.
Again, by this time, you also know that this trowel will also allow you to apply the proper quantity of mortar to these tiles.
But, for a 12×24-inch tile, you will need a squared notch ¼ inch x ½ inch trowel, whereas you need a 1/2 inch by 1/2 inch squared notched trowel for your 6 X 36 tile.
So, simply, the trowel size is all about the coverage you want for your tile.
Warpage (Cupping) calculation
Cupping calculation refers to the determination of how much ‘out of flat’ tiles you have.
Put tiles face-to-face and then gradually squeeze one corner. Cupped tiles cause the opposing corner to expand apart.
Divide the distance between the tile faces in the opposite corner by half. Thus, you have your tile’s cupping.
If compressing the tile creates a 1/4″ gap in the other corner, it’s 1/8″ cupped. For sufficient coverage, 1/8” must be added to the minimum amount of thickness required beneath the tile.
If you would like a 1/8″ layer of thin-set behind the cupped tile, use a 1/4″ trowel. Also, a 1/2-inch square-notched trowel will work.
Visual Inspection
Visual inspection involves thoroughly immersing the tile in a thin-set mortar, removing it, and inspecting the substrate and back of the tile for correct coverage.
Select the proper thinset
It is essential to make sure that you use the appropriate thin-set for each circumstance, in addition to selecting the appropriate trowel.
If you want unaltered mortar specifications, for instance, your safe bait is the Schluter products.
Additionally, the choice of cement for glass tile must often be done with extreme caution.
Thinset consistency matters
Indeed, the constancy of the thin set has a significant role as well. The selection of a notched trowel and the right mixing of thin-set operate hand in hand.
For this part, for the appropriate mixing ratios for making thin-set in small or large quantities, it is always safe to get expert advice.
>> What trowel size for 2″ floor tile?
Why Trowel Size Matters for 6×36 Tiles?
Ensuring Proper Adhesion
The right trowel size is crucial for proper adhesion of the tile to the substrate. For 6×36 tiles, a 1/2″ x 1/2″ square-notched trowel is typically recommended.
This size allows for the right amount of mortar to be spread on the substrate, ensuring that the tile adheres well.
Too little mortar can lead to poor adhesion, while too much can cause the tile to shift or result in an uneven surface.
Avoiding Lippage
Lippage refers to the condition where one edge of a tile is higher than the adjacent tile, giving the installation an uneven appearance.
The correct trowel size helps apply an even bed of mortar, which reduces the risk of lippage. An uneven application of mortar can lead to varying heights in the installed tiles, resulting in lippage.
Preventing Air Pockets Beneath the Tile
Air pockets beneath the tile can cause problems over time. They can lead to cracks in the tile or cause it to become loose.
The right trowel size ensures full coverage with mortar, minimizing the chance of air pockets forming beneath the tile.
Achieving a Clean, Professional Finish
The correct trowel size helps achieve a clean, professional finish by ensuring an even bed of mortar, leading to level tiles and neat grout lines.
This not only enhances the installation’s appearance but also makes it easier to maintain and clean.
Maximizing Longevity and Durability
The right trowel size contributes significantly to the longevity and durability of the tile installation. It ensures proper adhesion, reduces lippage, prevents air pockets, and achieves a professional finish.
All these factors result in a tile installation that looks great, lasts longer, and performs better.
Detailed Steps for Efficient Tile Installation
Preparing the Surface
The first step is to prepare the surface. This involves cleaning the area thoroughly to remove any dust, dirt, or debris. You can use a broom or vacuum for this purpose.
It’s crucial to ensure that the surface is flat and dry as any moisture or unevenness can interfere with the adhesive’s ability to bond with the tile.
Mixing the Adhesive or Thin-set Mortar
Once the surface is ready, you can proceed to mix the adhesive or thin-set mortar. It’s important to follow the manufacturer’s instructions on the bag for the correct water-to-mixture ratio.
Mix it until it reaches a thick, creamy consistency similar to peanut butter. After mixing, let it sit (also known as slaking) for about 10 minutes before you start using it.
Applying the Adhesive Consistently
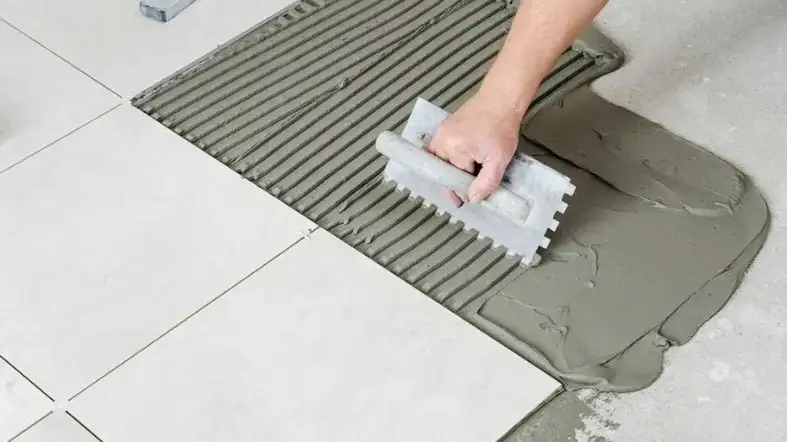
When applying the adhesive, use a trowel with the correct notch size for your tile size and type. Spread the adhesive evenly over a small area that you can cover with tiles before the adhesive dries.
When spreading, hold the trowel at a 45-degree angle and make sure to comb it in one direction. This helps in achieving a uniform depth of adhesive.
Periodic Checks for Adequate Adhesive Coverage
After placing a few tiles, it’s good practice to periodically lift one tile to check for adhesive coverage. The adhesive should cover at least 80% of the back of the tile in interior installations and 95% in exterior or wet environments.
If you see voids or trowel lines on the back of the tile, it means you need to adjust your trowel angle or increase your trowel size.
Cleaning Up Excess Adhesive
Lastly, remember to clean any excess adhesive from the tile surfaces and grout lines before it dries using a damp sponge or cloth. Be gentle when cleaning so as not to disturb the newly placed tiles.
FAQs About Sizing Trowel For 6×36 Tile
What Size Tile Trowel Should I Use?
The challenge of determining the correct trowel size for a given tile is a simple one. Tile trowels should always be selected based on the size of the tiles to be installed.
Is 6×36 Tile A Large Format?
Most of the time, larger tile formats are square or rectangular tiles that are bigger than 12 x 12. But, a 6×36 tile also falls among the big ones according to experts nowadays.
What Happens If You Use Too Much Thinset?
When using Spanish pavers, it is important to avoid using too much thinset to prevent discoloration and uneven surfaces.
How Long Should Thinset Dry Before Walking On Tile?
Before you may walk on tile, thinset glue has to cure for 24–48 hours. But, in just six hours, quick-setting mortar can withstand heavy foot activity. It’s possible to cause tiles to move or come loose if you walk on them too quickly.
Final Words
Installing tile that is 6 inches by 24 inches requires a trowel with a square notch that is 1/2 inch by 1/2 inch. This is the general rule.
The thin-set and tile suppliers may as well have particular recommendations for any particular tile. So, you should study their user guide and talk to them as well.
So, we can say that to ensure a flat and compact installation and repair, use the correct trowel size.
With the information we’ve presented, you should be able to figure out what size trowel for the 6 X 36 tile you would need.
