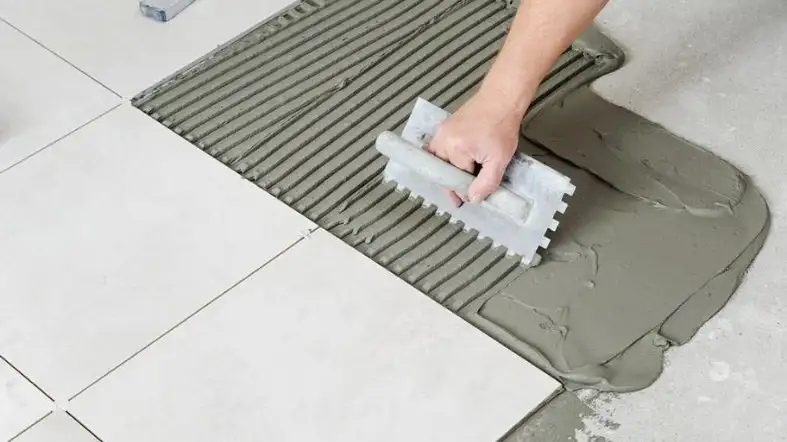
Having the proper size trowel is the primary prerequisite for having smooth, standard, and aesthetic tile work done.
Like any other tile, a 20 x 20 tile also requires a specific size of the trowel.
So, what size trowel for a 20×20 tile or what type of trowel you need is the primary question you might ask before setting up the tiles.
What Size Trowel For 20×20 Tile?
For 20×20 tile, the ideal trowel size is a 1/2″ x 1/2″ square-notch trowel. This size allows sufficient coverage of thin-set mortar, ensuring the tiles adhere properly and providing a stable, even surface for the large-format tiles. you can also use 3/8 x ¼ if you have swift hands.
20×20 Trowel Size Chart:
| Trowel Range | Dimension | Type |
|---|---|---|
| Small | 3/8 x ¼ inches | Square-notched |
| Big | 1/2 x ½ inches | Square-notched |
How To Choose The Right Trowel Size?
Knowing the thumb rule solves half the problem for you. If you are working with mosaic tiles, you should use a tile trowel with a V-notch.
If you are working with huge tiles, you should use a tile trowel with a square notch.
But there is a secret that only a few people know. In actuality, the amount of mortar your trowel can cover is more important than the trowel size in the first place.
The mortar coverage thickness is affected by the surface where you will install the tile. So, the factors that will affect the size of the trowel are:
- Trowel size
- The needed mortar coverage
- The surface of tile installation
Measure The Trowel
Tile trowel size is determined mostly by the teeth’s size and spacing.
When you spread the thin set-out, the towel size indicates how much of it will be left behind on the substrate by the trowel.
The teeth’s size and spacing of the trowel determine how much thin-set, after setting the tile, there will be between the substrate and the tile.
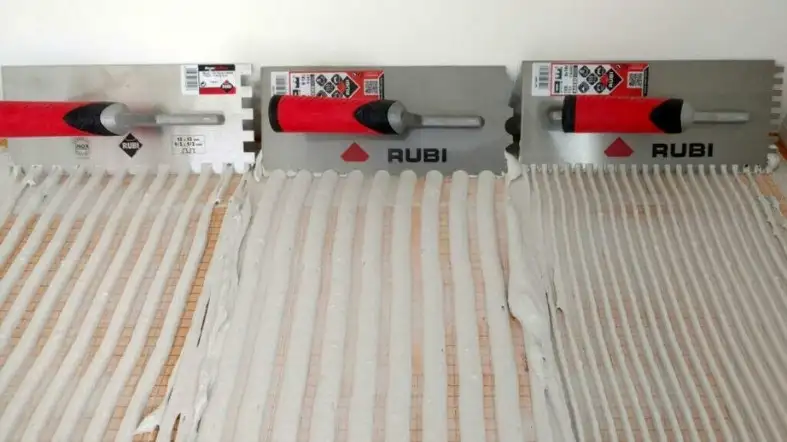
We usually have two major types of trowels (U-notched and Square notched). We measure them using the same technique.
- The first number tells you about the notch width
- The second number tells you about the notch depth.
>> What is the best trowel size for 3×12 tile?
Trowel With Square Notches
The equation for a one-measurement trowel is very simple. Here, 1/2 x 1/2 indicates that both measurements are equal.
Ridges of thinset will be 1/2″ inch and between each ridge, there will be 1/2-inch space.
A square-notched trowel of 1/4″ x 3/8″ will leave thin-set ridges on the substrate that are 3/8 inch high and 1/4 inch wide.
Between each ridge, the space will be 1/4 inch.
So, if you have a 3/8 x ¼ inches trowel, you know what it means. So, carefully inspect and see if the thinset amount is appropriate or not.
Trowel With U Notches
Trowels with U-notches almost never have more than one number. So, this indicates both depth and width.
You will get half-round ridges with this trowel. So, it is clearly not suitable for a 20 x 20 tile installation.
Mortar Coverage Is The Most Important Consideration

It is critical to ensure that each tile has the appropriate amount of mortar underneath it.
The back of each ceramic tile must adhere to the ANSI installation guidelines for ceramic tiles, which stipulate that there must be a minimum amount of mortar coverage.
It doesn’t matter if you’re working with a manual trowel or a trowel machine; the same standards apply to both.
So, according to the American National Standards Institute, the minimum requirement for mortar coverage ranges from 80% to 95% based on the concerned space.
| Description of the space | Minimum mortar coverage |
|---|---|
| Considerably dry areas | 95% |
| Wet areas | 95% |
| Natural stone tiles | 80% |
For instance, if you are installing tiles in your shower or bathroom, you just need 80% mortar coverage.
You apply the specific type of trowel and see If you get this desired coverage or not.
So, you can roughly guess what size trowel is going to do your job. But when you inspect the mortar coverage, you be certain of the size of the trowel.
How To Test The Mortar Coverage
- Apply the mortar very carefully. Then, place one of the tiles over it.
- Pull the trowel back up immediately.
- Now, inspect the back of the trowel. Check the quantity that was distributed on the tile backface.
This is the most effective method for determining whether or not the tiles are gaining the appropriate coverage.
Your trowel is not creating enough coverage if the distribution of the mortar is not uniform.
A blank space of 15% in the backface also refers to the uneven distribution. Even a 5% blank space in the wet condition is critical.
>> What size notched trowel for 6×24 tile?
Consider The Surface For Installation
The surface of the space plays a critical role here. When laying tiles on a floor that slopes, you need to use mortar that is far thicker than you would normally use.
When the surface is flat and tight, a little less amount of mortar can do the job. So, consider it all to determine the mortar level and trowel size.
Give Preference To Your Personal Choice
It is your home or office space. So, your personal preference should have a say.
The sort of tile trowel you choose for a particular installation will depend on your personal choice as well.
Larger tiles require larger trowels. Always use a bigger trowel than necessary. A little additional thinset is okay, but not enough will disrupt the installation.
Why the Right Trowel Size Matters for 20×20 Tile?
Choosing the right trowel size is crucial. It ensures proper adhesive coverage. For a 20×20 tile, a half-inch square-notch trowel works best.
It gives enough adhesive to bond the tile. Too little adhesive leaves gaps. This can cause tiles to crack.
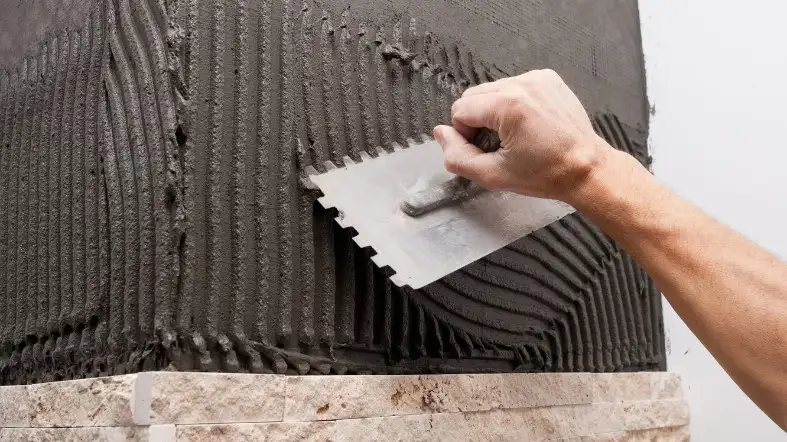
Proper Adhesive Coverage
Full adhesive coverage is key. Apply adhesive to the back of the tile using the flat side of the trowel. Then, comb it with the notched side. Aim for full coverage with no bare spots. This gives the tile a strong bond to the floor.
Preventing Tile Lippage
Tile lippage is when one tile sits higher than its neighbor. To prevent this, use a leveling system. Place clips under the tiles’ edges.
Then, insert wedges into the clips. This keeps tiles at the same height while the adhesive dries.
Ensuring Long-lasting Installation
For a long-lasting installation, let the adhesive dry fully before grouting. This usually takes 24 hours. After grouting, avoid heavy traffic on the floor for 72 hours. This allows the grout to cure fully, ensuring a durable and long-lasting installation.
Expert Tips for Installing 20×20 Tile
Preparing Your Surface
- Clean the surface. Remove dust and dirt. A clean surface helps the adhesive stick better.
- Check for level. Use a level tool to check the floor. It should be flat for the tiles to lay evenly.
- Fix any issues. If the surface isn’t level, use a leveling compound to fix it.
Achieving Full Adhesive Coverage
- Choose the right adhesive. For 20×20 tiles, a thin-set mortar works well.
- Mix the adhesive. Follow the instructions on the bag. The consistency should be like peanut butter.
- Apply the adhesive. Use a notched trowel to spread it on the surface. Make sure to cover the entire area where you’ll place the tile.
Navigating Obstacles in Tile Setting
- Plan your layout. Start from the center of the room and work your way out. This helps ensure an even layout.
- Cut tiles as needed. You’ll need to cut tiles to fit around obstacles like pipes or corners.
- Use spacers. These help keep your tiles evenly spaced and aligned.
Remember, patience is key when installing tiles. Take your time to ensure a job well done!
FAQs About Trowel Size For 20×20 Tile:
Can I Use A 3/4″ X 3/4″ Trowel For 20 X 20 Tile?
No, you should not use it. It is too small for a tile of 20 x 20.
So, the mortar distribution will be poor and you will require a lot of time. Ultimately, a poor installation will be the result.
What Happens If Thinset Is Too Thick?
The bond between the substrate and tile will be very poor.
An uneven surface and oozing between tiles will be the least of the problems for too much thin-set.
To ensure that the tile is firmly attached to the subsurface, only use the needed amount of thinset.
Is Thinset A Must For 20 X 20 Tile?
No, using mortar is the most ideal option for the installation of a 20 x 20 tile.
Just ensure the uniform distribution of mortar to get a quality installation.
Can you use a U-notched trowel for 20×20 tiles?
No, U-notched trowels are not recommended for 20×20 tiles; a square-notched trowel is more appropriate for this tile size.
Does the type of thin-set mortar affect the choice of trowel size?
Yes, the type of thin-set mortar can influence trowel size choice, as different mortars have varying consistencies and bonding strengths, necessitating adjustments in the amount applied.
Final words
So, knowing what size trowel for 20×20 tile does half the job for you. The type of trowel also has a considerable impact.
The rest depends on how well you utilize your equipment.
But if you don’t have the needed trowel, no amount of effort or expertise will save the day.
Always keep in mind that nothing matters more than the perfect size trowel for a top-notch and flawless tile installation.
