Eager to unleash your creativity and make your own rug with yarn? In this article, we’ll guide you through the fascinating world of rug crafting.
Get ready to turn bundles of yarn into a cozy masterpiece for your home!
How To Make A Rug With Yarn?
Creating your own yarn rug is a delightful DIY project, if you go through the following steps:
Essential Tools and Materials
Before you embark on your rug-making journey, it’s crucial to have the right tools and materials at your disposal.
These include a rug canvas or backing, which forms the foundation of your rug and comes in various materials like burlap, linen, and monk’s cloth.
You’ll also need a rug hook, scissors for precise cutting, a tape measure to ensure accurate measurements, and, of course, yarn.
The choice of yarn is extensive, with options ranging from wool to cotton, acrylic, or blended yarns.
Fabric dye (optional), a ruler, pencil, embroidery hoop, needles, and containers for organizing yarn by color can be handy.
Planning Your Rug Design
>> Do area rugs make a room warmer?
Designing your rug is where your creativity takes center stage. You can make choices about the rug’s shape, size, theme, and personal touches.
Start by picking a shape, whether it’s rectangular, round, oval, square, or something uniquely asymmetrical.
Measure the area where you plan to place the rug to determine the right size.
Choosing a theme, such as floral patterns, geometric designs, animals, or landscapes, can be inspirational.
You can also make your rug deeply personal by incorporating meaningful colors, numbers, words, or images.
For beginners, it’s wise to begin with simple patterns and a limited color palette.
Starting Your Rug Project
Once you have a clear design in mind, it’s time to commence your rug project. Begin by marking the dimensions of your rug on the canvas with a pencil or chalk.
If you intend to dye your yarn, it’s best to do this before starting. Cut your yarn into strips of varying lengths and widths to add texture to your rug.
Organize your yarn by color in separate containers to keep things orderly.
Begin hooking your rug by anchoring the first row of loops along one edge of the canvas, maintaining even spacing, and firmly pressing each loop into place.
Use your hook tool to pull loops of yarn through the canvas, following your design.
It’s normal for the initial stages to feel a bit challenging, but as you progress, you’ll become more comfortable with the process.
>> What is the price of bear skin rugs?
Mastering Rug-Making Techniques
With practice, you’ll master various techniques to create a tight and durable rug. Loop packing is essential to avoid gaps in your design.
Ensure you pack loops tightly, applying even pressure.
Locking loops involves interlocking the loops by inserting the hook under a loop and pulling new yarn through, securing each row.
Once you’ve completed several rows, trim the loops to a consistent length using sharp scissors.
To achieve a clean finish on the visible outer edges of your rug, use a wider strip of yarn and wrap it around the canvas edge.
The last row should have longer loop tails, which can be braided, tied, or left as a fringe.
As you practice these techniques, you’ll find rug making to be a rewarding and enjoyable craft.
Finishing Touches and Rug Care
Completing your rug involves a few finishing touches and proper care to ensure its longevity. Add a fabric backing to provide stability.
You can attach it using hot glue or simple whip stitches. To define the edges, consider machine stitching around the borders or adding trim for a polished look.
If you desire more texture, clip and tease loops once you’ve added the backing.
To maintain your rug’s vibrancy, vacuum it regularly and address stains promptly, avoiding soaking or harsh scrubbing, which can damage the yarn fibers.
If you notice indentations, gently reshape and smooth them with your fingers or a damp towel. To prevent fading, limit your rug’s exposure to direct sunlight.
With these finishing touches and proper care, your handcrafted rug will serve as a beautiful and unique addition to your home for years to come.
>> How to clean fake fur rug tutorial?
Rug Design and Pattern Selection
When it comes to creating your yarn rug, one of the initial and exciting steps is choosing the design.
This is where your creativity takes center stage, and you can customize your rug to match your style and preferences.
Finding Inspiration
Inspiration for rug designs can be found in various places.
Nature offers an abundance of ideas, with leaves, flowers, landscapes, and animals providing beautiful motifs.
If you’re looking for timeless choices, consider cultural designs like tribal,
Oriental, or Mediterranean styles. Architectural elements such as tiles, ironwork, or stained glass can inspire abstract rug designs.
Your favorite places and memories from special trips can also be incorporated into your rug. Art, photography, and personal collections are other sources of inspiration.
Design Principles
While choosing a rug pattern, it’s essential to consider some design principles to create a polished and visually appealing piece.
Repeating elements, such as motifs and mirror images, can establish cohesion in your design.
Strive for balance by ensuring an even distribution of visual weight in your composition.
Use elements like lines, gradients, or strategic placement to create movement and guide the viewer’s eye.
Consider adding a central medallion or border to create a focal point of interest.
Contrasting colors, scales, and textures can add visual impact, while unity can be achieved by maintaining consistent color schemes, shapes, and subject matter throughout your design.
Customizing Your Design
>> Is it acceptable to use the same rug in different rooms?
One of the advantages of DIY rug making is the ability to customize every aspect of your design.
You can scale motifs to fit your rug’s dimensions, making them larger or smaller as needed.
If you’re a beginner, simplifying complex designs by reducing intricate details can make the project more manageable.
Changing colors is another way to put your personal touch on the design. You can alter the color palette to suit your preferences and match your decor.
Consider incorporating text, such as letters, dates, quotes, or meaningful words, to make your rug uniquely yours.
If you’re feeling adventurous, mix and match elements from different patterns to create a fusion that reflects your style.
Color Palette Selection
Selecting the right color palette is a crucial decision that significantly impacts the overall look of your rug.
Limiting the number of hues to 2-4 dominant shades can create a harmonious and visually pleasing rug.
Gradating tones by progressively shifting between light and dark values of a single hue adds depth and dimension to your design.
Complementary colors, those located opposite each other on the color wheel, can provide a striking contrast.
You can use analogous colors, which are adjacent to the color wheel, for a cohesive and familiar feel.
Neutrals, including shades of white, black, brown, and gray, can serve as a rich foundation for your color scheme.
To add visual interest, incorporate different values, including lights, mediums, and darks.
Pattern Complexity
As a beginner, it’s advisable to start with less intricate designs and gradually work your way up to more complex patterns.
Geometric patterns, which feature repeating shapes like grids, stripes, circles, and diamonds, are a good starting point.
Borders and frames can help contain your imagery within linear edges and corner motifs, making them more manageable.
Stylized floral designs offer beauty without excessive complexity and are a great choice for those new to rug making.
Nautical themes, featuring classic maritime elements like ships, knots, and waves, provide straightforward motifs that are easy to work with.
Cultural patterns with bold and graphic components from traditional designs can also be a suitable choice for beginners.
Save extremely complicated designs for when you gain more experience in rug hooking.
Scaling and Repeating Patterns
When you’ve settled on a design, it’s essential to plan how it will fit within your desired rug dimensions.
For patterns that repeat in identical modules, scaling them to different sizes is straightforward.
Central medallion styles can expand concentrically as your rug size increases, creating a cohesive look.
When repeating a pattern, be mindful of how it fills the edges to ensure even distribution.
Mapping out your repetitions on graph paper scaled to your rug’s dimensions can help with accuracy.
Double-check your measurements using the canvas to ensure your design aligns with your intended rug size.
Creating scaled templates for tracing onto each new rug can maintain consistency in your design, ensuring a polished finish.
Careful planning of repetitions will help you achieve symmetry and a professional look in your rug design.
Making Your Rug
Here’s a step-by-step guide to help you on your rug-making journey.
Starting Your Rug
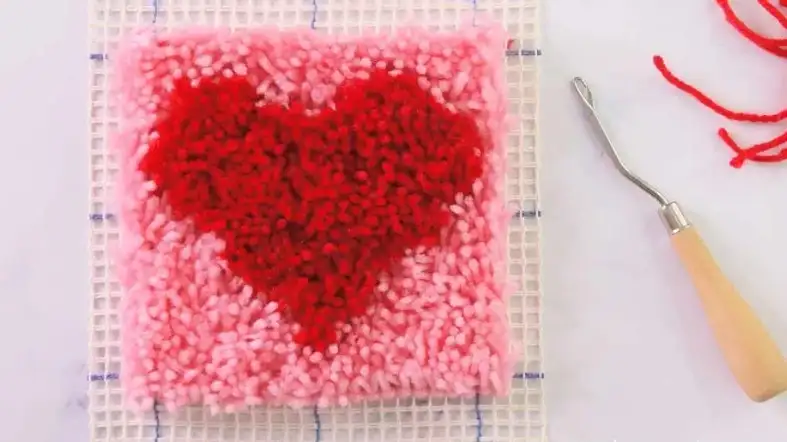
The foundation of a great rug lies in its starting point. Begin by securely stretching your backing material within an embroidery hoop or frame.
This ensures a taut surface for your work. Next, use chalk, pencil, or masking tape to outline your entire design on the backing. This serves as your roadmap.
Cut your wool strips into loops of varying widths. These loops will form the body of your rug, and using strips with 8-20 loops per inch can add texture.
Begin by anchoring the initial row of loops, maintaining consistent spacing, and applying firm, even pressure.
As you work, refer to your design outline to build subsequent rows. This meticulous starting process sets the stage for a tightly hooked rug that retains its shape.
Basic Rug-Making Techniques
As you progress in your rug-making project, it’s important to master some fundamental techniques that ensure durability. First, focus on loop packing.
By densely packing the wool strips, you can eliminate gaps in your design, resulting in a more cohesive look. Locking is another key technique.
It involves securing rows by inserting your hook under the loop and pulling a new strip through. This ensures that your rows stay in place and don’t come undone.
After several rows, you’ll want to trim the loops evenly using sharp scissors. This step provides a clean and polished finish to your rug.
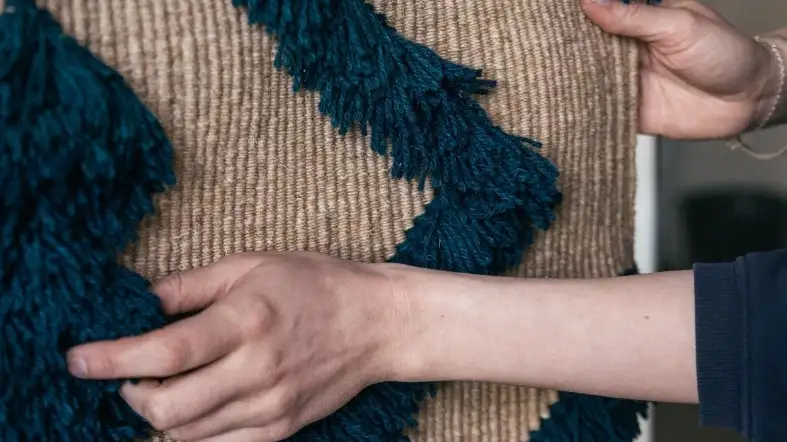
Don’t forget about edge finishing. Wrapping wider strips around the rug’s edges creates a neat border, giving your rug a professional look.
>> replacement for rug under dining table?
Adding Color and Texture
Now, let’s talk about adding color and texture to your rug. This is where your creativity can truly shine. You have several options to explore.
Consider creating dimension in your design. Use wool strips of varying thickness to add depth and tactile interest to your rug.
Experiment with different shades of the same color to achieve a monochromatic look, or use brighter hues strategically to draw attention to focal points in your design.
You can also outline motifs with contrasting colors for added impact.
If you have a specific color in mind that’s not readily available, custom dyeing is an option to explore. Don’t forget about upcycling.
You can give new life to old clothes, scraps, or t-shirts by incorporating them into your rug design.
Rug Size and Shape
Moving beyond basic rectangular rugs opens up a world of creative possibilities.
Nature can serve as your muse, inspiring organic shapes like waves, stones, or flowers.
You can embrace geometric motifs, incorporating hexagons, triangles, circles, or stars as fun templates.
For a more freeform and artistic approach, cut your backing material into asymmetrical shapes that defy traditional dimensions.
Assign numeric significance to your rug’s measurements by incorporating meaningful numbers or dates into your design.
Consider creating smaller hooked pieces that can serve as unique wall hangings, turning your rug into a work of art.
Finishing Your Rug
To put the finishing touches on your rug-making project, consider the following steps. First, add a backing to your rug.
This provides stability and prevents the rug from slipping or shifting on the floor. You can achieve this by gluing burlap, felt, or canvas to the reverse side of your rug.
Think about edge binding. Wrapping the rug’s borders with binding tape or fabric strips creates a neat and polished appearance.
For an extra decorative touch, you can add fringe to your rug. This can be done by sewing or braiding yarn ends along the edges.
If you want to take your rug to the next level, consider embellishing it with additional details.
Embroidered patterns, beads, buttons, or other decorative elements can enhance the overall aesthetic. Don’t forget to leave your mark on your masterpiece.
Stitch your signature and the date on the reverse side of the rug, signifying its creation.
>> Can you have a fire pit on an outdoor rug
tips for Making A Rug With Yarn
Making a rug with yarn can be a fun and rewarding craft project. Here are some tips to help you get started:
Choose the right yarn:
When making a rug, it is important to choose a yarn that is durable and can withstand foot traffic.
Look for a bulky or super bulky weight yarn made from natural fibers such as wool or cotton.
Select the right hook or needles:
Depending on the type of rug you want to make, you may need a crochet hook or knitting needles.
Make sure you choose the right size for the thickness of your yarn.
Plan your design:
Before you begin, decide on the design and color scheme of your rug.
You can choose a simple pattern, such as stripes or a solid color, or a more intricate design.
>> Which type of wool rug doesn’t shed?
Start with a foundation chain:
To begin your rug, create a foundation chain that is the desired length of your rug.
You can then work rows of single crochet or knitting stitches into the chain.
Keep your stitches tight:
When working with yarn to create a rug, it is important to keep your stitches tight to prevent gaps in the fabric.
This will make your rug more durable and prevent it from stretching out over time.
Use a non-slip backing:
To prevent your rug from sliding around on smooth floors, consider adding a non-slip backing.
You can purchase non-slip rug pads or use a spray-on non-slip coating.
Finish your rug:
Once you have completed your rug, you can finish the edges with a simple border or fringe.
You can also add any embellishments, such as tassels or pom-poms, to personalize your rug.
>> is polypropylene rug safe for toddlers?
FAQs on How To Make A Rug With Yarn
Can You Make A Rug Out Of Yarn?
You will be able to make a rug out of yarn if you have the supplies and follow the steps mentioned in this guide.
Also, you can make the Rug non-slip by using a rug pad, glue, double-sided tape, or a brush with rug backing.
What Kind Of Yarn Is Best For Rug?
The best type of yarn for a rug would be durable and thick yarn.
This is because the Rug will need to withstand a lot of foot traffic and will also need to be able to hold up its shape.
Use coarse wools, cotton cords, or specialist linen warp yarn for the Rug.
How Do You Make A Rug With Crochet?
If you want to crochet a rug, you must first create a foundation chain. Once you have completed the foundation chain.
You will single crochet into each stitch until the Rug is the desired size.
To make a non-slip rug, you can use a rug pad, glue, double-sided tape, or a brush with rug backing.
How Hard Is It To Make A Rug?
The difficulty level will depend on the type of Rug you want to make.
For example, a crochet rug will be easier to make than a woven rug.
Both types of rugs can be made easier if you have the supplies and follow the steps in this guide.
Overall, creating a rug is not too difficult.
Final Thoughts
Making a rug with yarn is a fun and creative craft project that can add a personal touch to your home decor.
Choosing the right yarn, selecting the appropriate hook or needles, planning your design, starting with a foundation chain, keeping your stitches tight, and adding a non-slip backing are all important steps in creating a durable and beautiful rug.
With a little patience and creativity, you can make a rug that is both functional and stylish, and that will be a unique addition to your home.
So, grab your yarn and get started on creating your own handmade rug!
